Tuesday, 28 February 2017

Retro LED Displays

I recently brought some of these rather nice Texas Instruments TIL311 hexadecimal displays from eBay, they are really small but beautiful.  This got me thinking, could I connect one of these displays to a micro:bit.  

TIL311 Displays


Looking at the TIL311 datasheet, I came across the first hurdle.  The TIL311 is a TTL device and needs 5v to work but the micro:bit runs at 3.3v so I needed a level shifter / buffer IC to interface between them, you could probably get away without a level shifter but I aired on the safe side. I chose the 74HCT244N but I used a 74HC244N as this is what I had in stock.


The TIL311 has a 4-bit data input A,B,C,D  which I connected to pins 0,1,2 & 8 on the micro:bit via a 74HCT244N and used separate 5v supply for the display.  To figure out how to display 0 to 9 I looked at the truth table for a 7490 decade counter and then replicated this in Python by turning the outputs on and off.


The finished project


My rather noddy Python code, I'm sure there must be a neater way of doing this.


  1. from microbit import *
  2. pins = [pin0, pin1, pin2, pin8]
  3. while True:
  4.     0#
  5.     pin0.write_digital(0)
  6.     pin1.write_digital(0)
  7.     pin2.write_digital(0)
  8.     pin8.write_digital(0)
  9.     1#
  10.     pin0.write_digital(1)
  11.     pin1.write_digital(0)
  12.     pin2.write_digital(0)
  13.     pin8.write_digital(0)
  14.     sleep(500)
  15.     2#
  16.     pin0.write_digital(0)
  17.     pin1.write_digital(1)
  18.     pin2.write_digital(0)
  19.     pin8.write_digital(0)
  20.     sleep(500)
  21.     3#
  22.     pin0.write_digital(1)
  23.     pin1.write_digital(1)
  24.     pin2.write_digital(0)
  25.     pin8.write_digital(0)
  26.     sleep(500)
  27.     4#
  28.     pin0.write_digital(0)
  29.     pin1.write_digital(0)
  30.     pin2.write_digital(1)
  31.     pin8.write_digital(0)
  32.     sleep(500)
  33.     5#
  34.     pin0.write_digital(1)
  35.     pin1.write_digital(0)
  36.     pin2.write_digital(1)
  37.     pin8.write_digital(0)
  38.     sleep(500)
  39.     6#
  40.     pin0.write_digital(0)
  41.     pin1.write_digital(1)
  42.     pin2.write_digital(1)
  43.     pin8.write_digital(0)
  44.     sleep(500)
  45.     7#
  46.     pin0.write_digital(1)
  47.     pin1.write_digital(1)
  48.     pin2.write_digital(1)
  49.     pin8.write_digital(0)
  50.     sleep(500)
  51.     8#
  52.     pin0.write_digital(0)
  53.     pin1.write_digital(0)
  54.     pin2.write_digital(0)
  55.     pin8.write_digital(1)
  56.     sleep(500)
  57.     9#
  58.     pin0.write_digital(1)
  59.     pin1.write_digital(0)
  60.     pin2.write_digital(0)
  61.     pin8.write_digital(1)
  62.     sleep(500)

Sunday, 26 February 2017

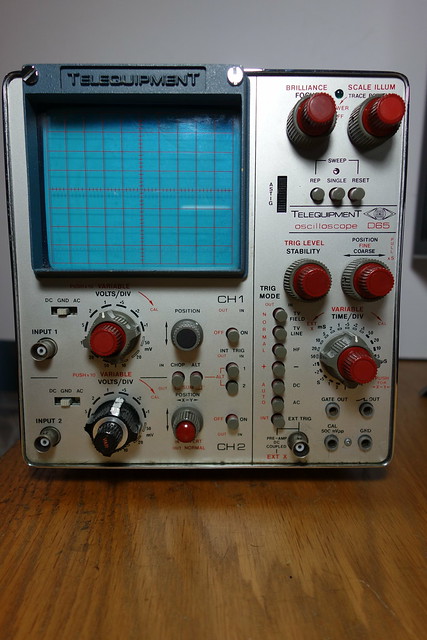
Telequipment D65

Some time ago I acquired an old 1976 vintage Telequipment D65 - 15MHz, all solid state dual-trace scope.  Unfortunately it had a couple of faults which is why it was being thrown away.

Telequipment D65

The scope basically worked but.
  1. It wouldn't turn on as the scale illumination / power switch knob was cracked and therefore kept slipping
  2. The trigger was intermittent, when powered on the triggered sweep may decide to a) start halfway across the screen, b) in the correct position and then fade or c) work as advertised.
Well the first thing I did was fix the broken knob, nothing a bit of superglue didn’t solve. This was only a temporary fix until I obtained a replacement second hand knob.  Now I could move onto fixing the annoying intermittent trigger fault. 

After a bit of digging around on the net I stumbled across this post on the UK Vintage Radio Repair and Restoration forum. Somebody else was having the same issue which could be fixed by tapping the trigger knob or the side of the case for that matter. 

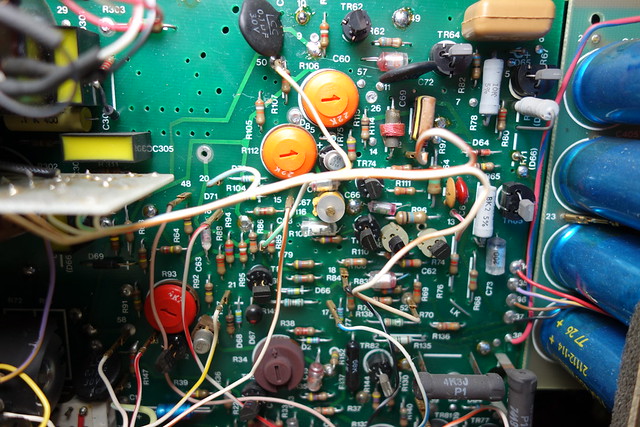
Trigger, Timebase X amp & blanking PCB
Troublesome PCB


The fault was on the trigger, time base x-amp and blanking PCB.  It would seem that these scopes use doubled sided PCB's with naff though hole links which go bad with age. I re-flowed the solder on all the little links and this fixed the problem. 

Overall I'm pleased with this little scope which weighs 11.5Kg, it has made a  great addition to the workshop.  I should recap the power supply board at some stage.

Some more pictures of this scope can be found on my Flickr page.

Wednesday, 22 February 2017

A blast from the 8-bit past

I recently re-discovered my vintage VIC20 computer which was first released in 1981.  It had been hiding in the loft of plenty for some years so I got it down and decided to give it a whirl to see if it still worked.


One slight problem, the original power supply had mysteriously disappeared. I had a quick search on the online tat bazaar eBay for a replacement but alas there were none. Eventually one did turn up and after a few clicks, it landed on my doormat.

And there was much rejoicing!!!!


I duly powered my VIC20 on to see if it still worked, no magic smoke escaped YAY. I was presented with the classic start screen.


While looking for VIC20 stuff I stumbled across thefuturewas8bit website and saw the Penultimate cartridge which looked interesting. The Penultimate cartridge is loaded with 40 ROM images and has a 3-35k selectable memory expansion.   

PenUltimate  Cartridge


Magic time travelling tape.


I duly ordered one and it arrived just in time for a super 8-bit Christmas.  It was carefully packed and had some magical time travelling original Commodore logo packing tape on the box.  What a nice touch. When it arrived I gave it whirl on my VIC20, simply brilliant. Love all the old games, the menu system works a treat and it's very well designed. If you want your own then click here.


Unfortunately the good times didn’t last as my VIC20 soon failed.  When powering on it was displaying random characters, wouldn’t sync or just showed a black screen. Well that’s not good and after a bit of googling I suspected that the 6561 VIC (Video Interface Chip) chip had failed.  These chips are prone to failure due to age and they run hot.  

One bad VIC Chip


Well back to eBay to look for a replacement VIC chip, oh so they appear to be as rare as hen’s teeth. Plan B look for a VIC20 mainboard, luckily I managed to find a working tested one. It arrived a few days later so I removed the VIC chip and pressed it into service. Success my VIC20 was restored to full working order.

Replacement VIC20 Mainboard


Normal service has been resumed


Having treated my VIC to the Penultimate cartridge I recently bought myself a genuine recycled VIC20 plastic cased SD2IEC.  The SD2IEC emulates the classic Commodore 1541 Floppy Disk Drive and uses an SD card for storage.

I have to say it’s rather nice, I love the case as it matches my VIC20.  It’s another fantastic product from thefuturewas8bit.  After I imaged a SD card, I gave it a whirl well I’m really impressed.  Solid state flash memory is the future, all I can say is go buy one.

Limited edition genuine recycled VIC20 plastic cased SD2IEC

Giving my new SD2IEC a quick whirl


Friday, 17 February 2017

A Marvelous Micro:bit Afternoon

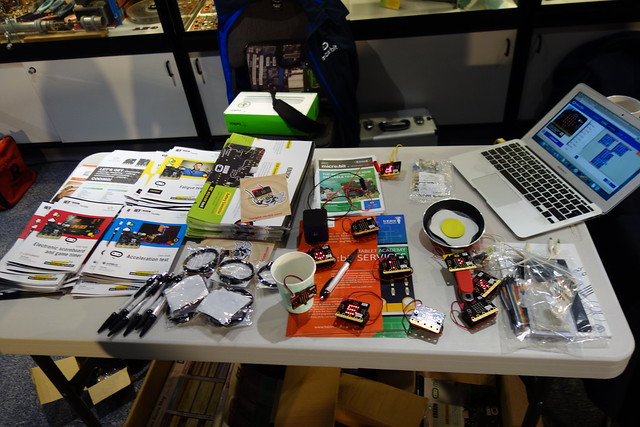
On Thursday 16th Feb I went along to the National Museum of Computing to show some of my micro:bit projects at their Bytes Festival.   I was sharing a table with the amazing David Whale and Nevil Hunt who also had some fantastic micro:bit demos on display.

If you are visiting the amazing Bletchley Park then do also visit the museum as it’s such a fantastic place and has loads of amazing historical computing items on display.  Follow the links below for more details about both museums


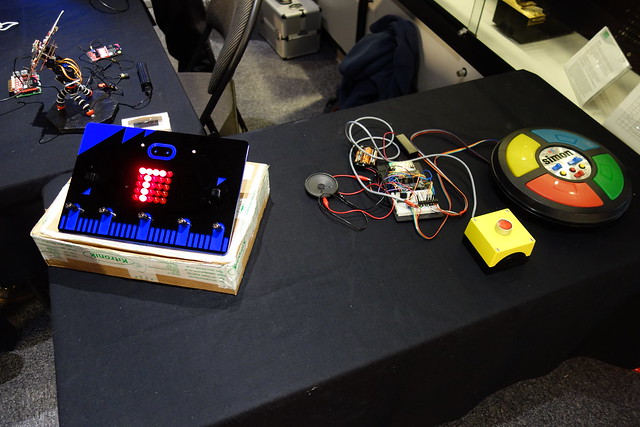
My micro:bit projects on display, I took the Megabit and Micro Simon game along. There was lots of interest in both.

DSC02468


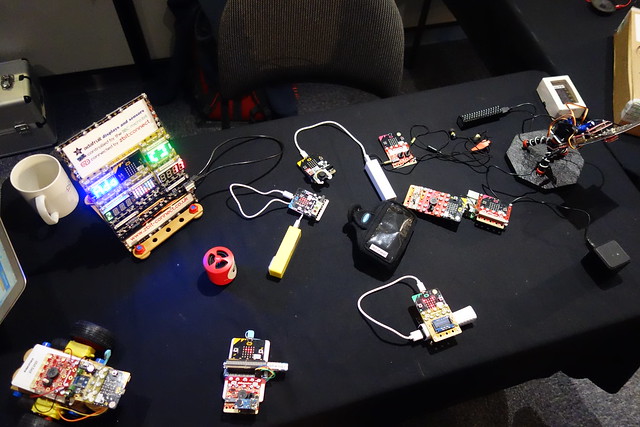
David Whale had some excellent micro:bit demos on display, the teleporting giraffe was a big hit.

DSC02472


Nevil Hunt had some of his amazing zbit:connect projects on display.  To find out more about these amazing boards - click here

DSC02489

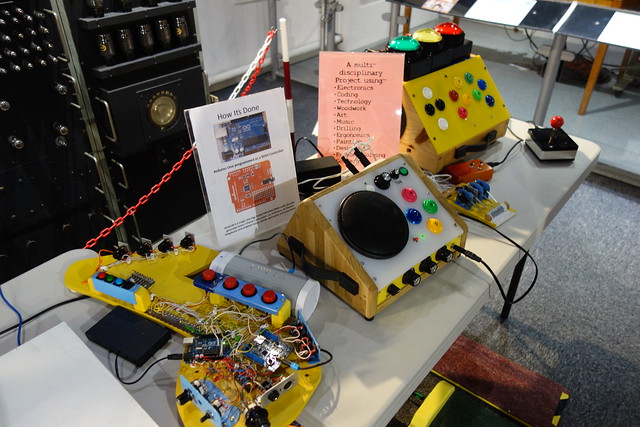
Philip Catterall had some really interesting accessible music projects on display, you can find out more about these awesome projects here.

DSC02492

Two British Computing hero's.  David Allen who produced the 1980's BBC Micro programmes and Bill Thompson a leading member of the BBC's Make It Digital campaign. They are in front of the amazing EDSAC Replica Project.

Two British Computing heros

Some more pictures from the day can be found on my Flickr page.

The day ended with a fantastic talk by Bill Thompson about the challenges of the BBC Make it Digital campaign and the BBC micro:bit roll out.

Finally I would like to thank everyone at the museum for making me feel so welcome. I would also to thank David Whale from the Micro:bit Foundation for inviting me along and giving me the opportunity to show some of my micro:bit projects.

On a footnote, the National Museum of Computing have produced a short video of the micro:bit day at the Bytes Festival on Thursday 16 February.   See if you can spot the Megabit.